FLIPSKY FSESC 75350 / Remote VX3 / Motor 85135 Wire Connection and Settings Tutorial

In this blog, we will show how the Flipsky FSESC 75350 works with waterproof motor 85135 and waterproof remote controller VX3 for water sports?
Items:
FSESC 75350 with water cooling enclosure *1pcs
Fully Waterproof Remote VX3 controller *1pcs
Fully Waterproof Motor 85135 with propeller *1pcs
*For the operation tutorial on how to set up the water cooling device and how to use the VX3 remote control in the water field (efoil, surfboard), please refer to the blog: FLIPSKY FSESC75200 / Remote VX3 / Motor Wire Connection and Settings Tutorial
Step 1: Components Connection
- Motor Propeller Assembly

-
Connect the battery and ESC
-
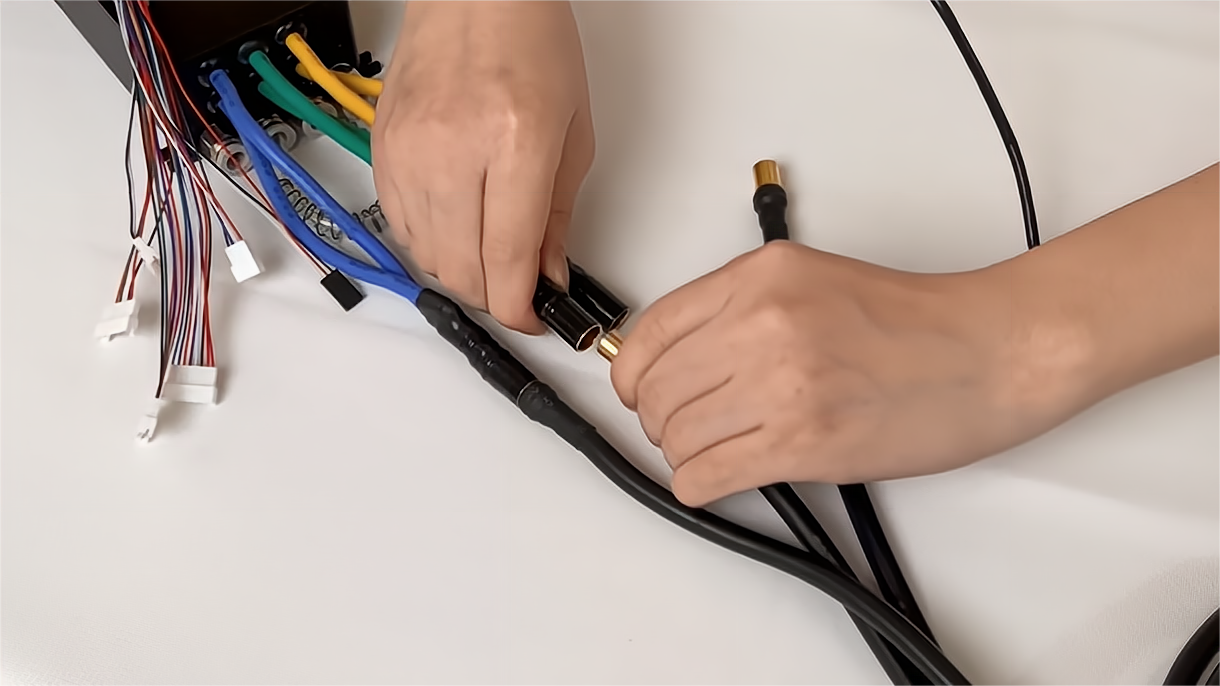
Connect the ESC and the motor
The 85135 motor shipment comes with 3 pairs of 10mm bullet connectors, and customers can solder 10mm female connectors on the ESC side according to their own needs.
Step 2: VESC Tool Parameters Settings
(*Phase filer is not available for Flipsky ESC75100 and 75200!
Please turn off the phase filter function and choose "false" in vesc_tool when use firmware version on or above 5.3 (VESC_TOOL 3.01). Without turning off the phase filter will result in escs damage. Please do not restore the default parameters when using the wizard interface.)
-
85135 Motor FOC Settings
Choose the correct motor type. For motor 85135 select "Large Inrunner (~2000g)"
Write the battery cells per your battery voltage.
Select "Direct Drive" and click "Run detection (no CAN for single esc)"
The screen shows motor FOC detection results. Check if there is any abnormal data. Click "OK" after the confirmation.
Click "Finish'' to complete the motor FOC detection.
After determining the direction of the motor, click "Finish" to complete the motor matching.
-
VX3 Remote Controller Input Setup
① Follow the wiring diagram to connect the receiver with the ESC's PPM port.
Power on the esc and check if the receiver with blinking blue led, the receiver's blue led will become solid after pairing succeed.
② Remote controller VX3 input setup
Click "Setup Input" - "Next"
Choose the "PPM input", click Next.
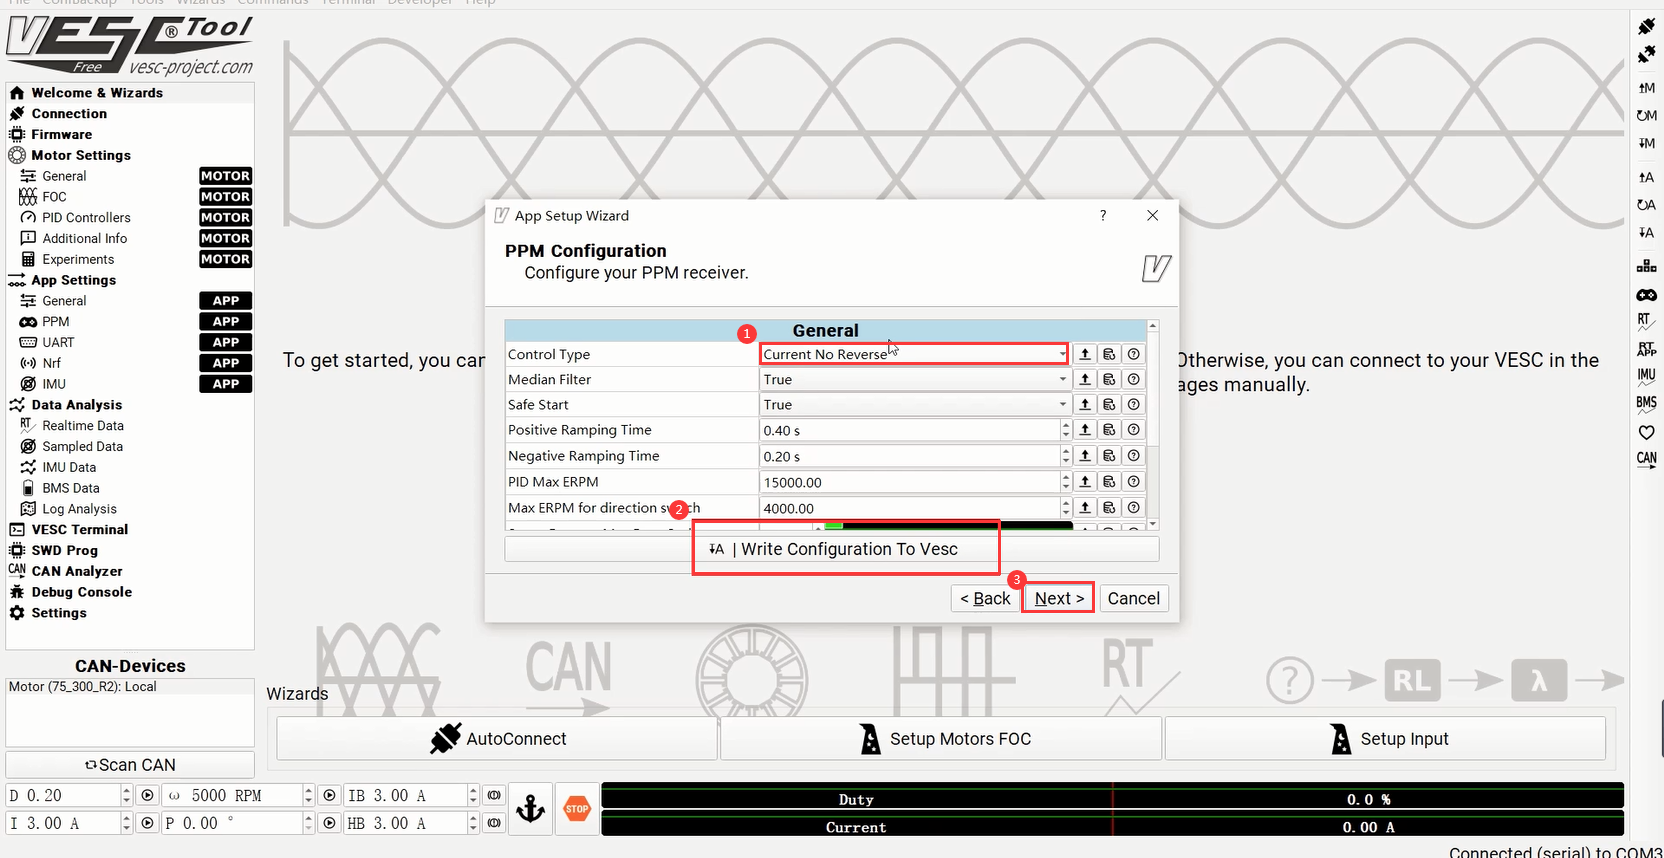
Choose the "Current No Reverse" control type. Pull the remote throttle to the maximum, release the throttle and click "Apply"--Click"Next"
Choose the "Current No Reverse"--Click "Write Configuration To Vesc"--Click "Next"-Click "Finish"
Check and make sure the "App to use" is "PPM" and click the right APP write in.
VX3 remote controller matching complete.
(*Tips: Do not run the waterproof motor in the air for a long time to avoid the waterproof layer damage.)
Video Tutorial:
That's all for this article, thank you for your patience.
For more tutorials and new product introductions, please follow our social media:
https://www.youtube.com/c/FlipskyTech
https://www.instagram.com/flipsky_tech/
https://www.facebook.com/FlipskyTech


Leave a comment